Giant LED eyes v2
Having proved I could print a shell 5 times the size of a standard LED I thought I’d repeat the process on MadLab’s newly acquired resin printer (it’s a Form 1+) to see what the difference in quality was.

As you can see it’s a much cleaner, more solid looking print albeit a touch wonky. It also looks a whole lot more like an LED than my first print.
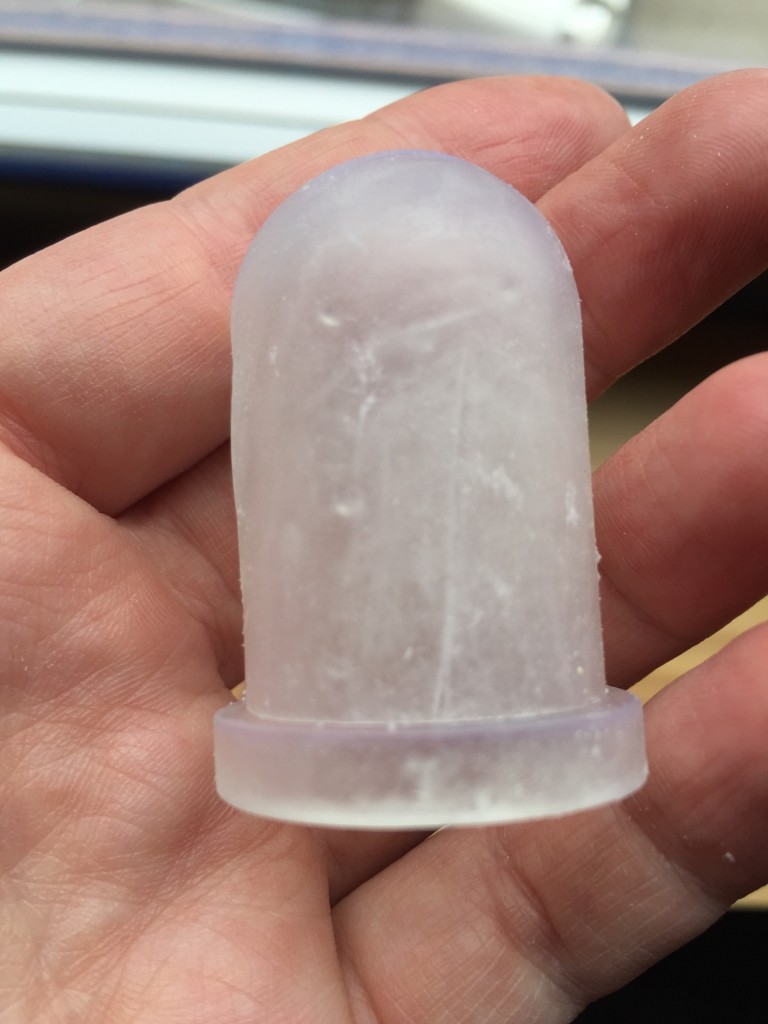
OK, it’s a lot wonky:
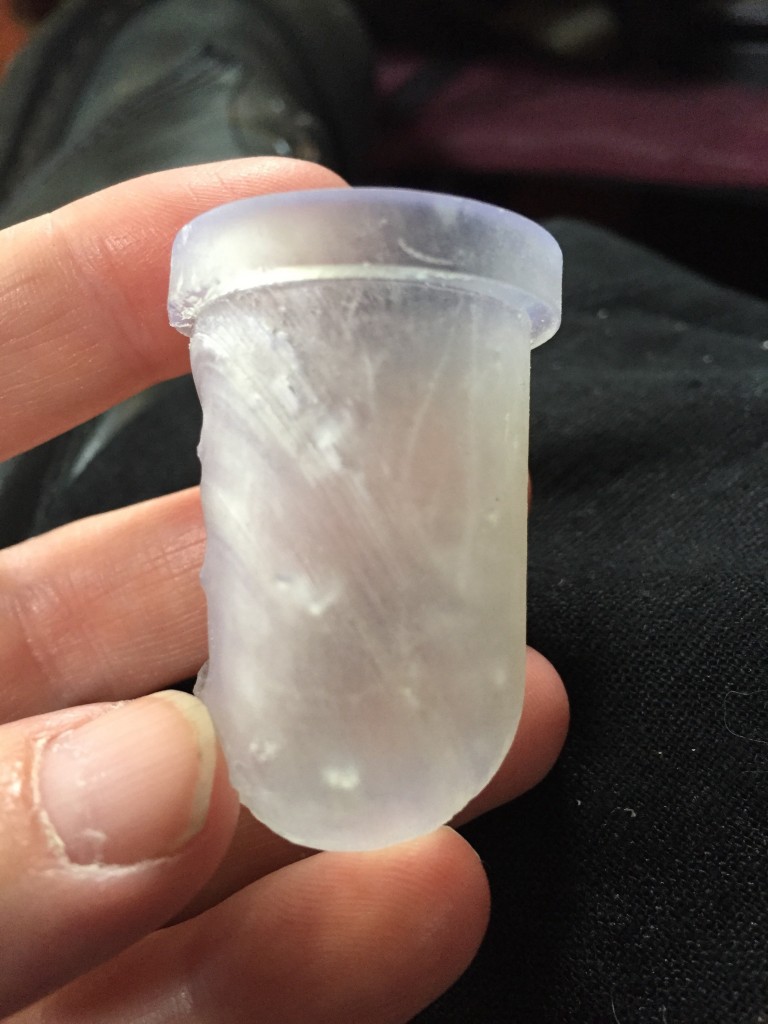
This really surprised me, and my initial explanation was that the wobble must have been caused by the printer being on a flimsy table while lots of people trooped past to get lunch. Closer inspection however revealed that the wobble was all on the “bottom” of the print. This suggested that it hadn’t had enough support to keep itself the right shape during the printing process. Again, I was surprised as, having not used this printer before, I was quite careful to RTFM and follow the instructions. With slight trepidation therefore I ignored the auto-orientation button, rotated my print to the angle I thought I would print best at and then auto generated supports. Having done that, I spent a few minutes removing the majority of the internal ones and replacing them with the minimum number that the software thought it could handle (I wasn’t quite brave enough to just leave them out entirely). The result is pictured below
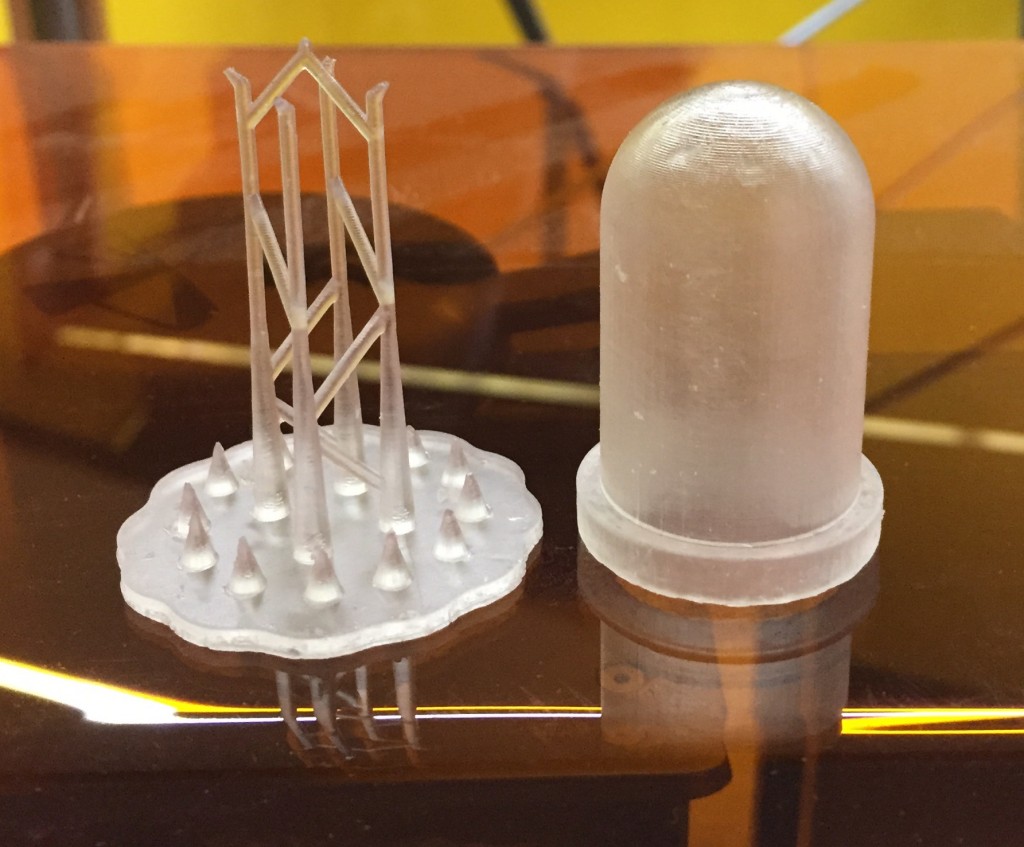
As you can see it’s a lot cleaner print, I didn’t move the printer to do it, I just used the settings my instincts and experience of 3D printing told me to use rather than the auto-generated ones (kinda makes me think of this t-shirt). Once I’d got a clean print, I discovered that the tolerance on the Form 1+ is a lot tighter than that on the Mendel 90 we have in HacMan. So where the Adafruit NeoPixel Jewels I am using to make these monsters glow was a tight fit on the original it now falls out and had to be hot glued in place (I’d have used something more elegant but we seem to be suffering from a bit of an adhesive shortage).
![]()
So now it was time to connect it to an Arduino and make it do funky things: The code it’s running here is a version of the theaterChase code included in the Adafruit NeoPixel Library, I had to tweak it a little I didn’t want it to include the central NeoPixel (0) when cycling and I wanted it to only light two pixels, one on each side of the Jewel in order to create a circling effect.
void rotate_single_colour(uint32_t c, uint8_t wait) {

    /* iteration starts at 1 to make it ignore the central pixel of the jewel. */

    for (int i=1; i < pixels.numPixels(); i++) {
        // wipe all the pixels, so we're starting from blank each time.
        // this is simpler than attempting to selectively turn off pixels

        for (int d = 0; d < pixels.numPixels(); d++ ) {
            pixels.setPixelColor(d, 0);
            }
        // set the first pixel to the chosen colour
        pixels.setPixelColor(i, c);

        // work out which pixel is directly opposite the lit one
        int z = i + 3;

        // check that the iterated pixel no. is actually within the jewel
        if ( z < pixels.numPixels() ) {
            pixels.setPixelColor(z, c);
        } else {
            /* if the pixel isn't within the jewel take away the no of pixels then add 1 to compensate for the fact that 0 isn't being used. */

            z = z - pixels.numPixels() + 1;
            pixels.setPixelColor(z, c);
        }

        pixels.show();
        delay(wait);
    }
}
Did you really come to see where we’d got to with putting the giant BUG! together? Here you go:
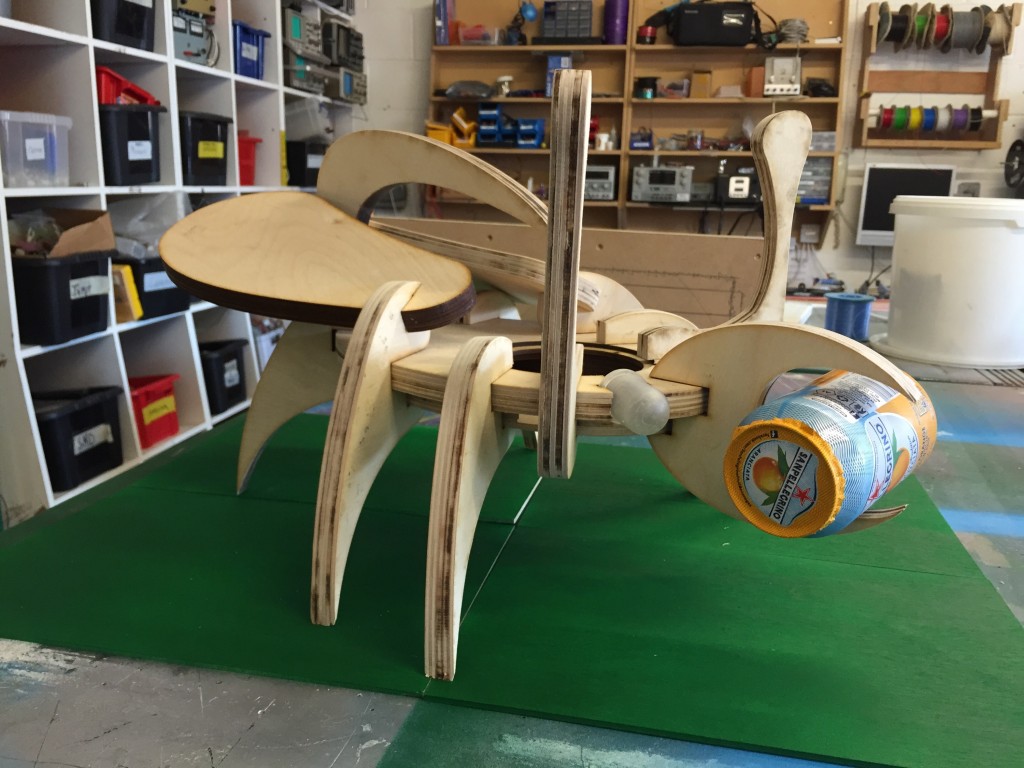
That can is full btw.
Reminder:
If you want to see the BUG! in all it’s hugemongous glory and make yourself a normal sized one we will be at Liverpool MakeFest next Saturday 27th June 2015 and Manchester MakeFest on 8th/9th August 2015.
Comments powered by Talkyard.