Making a CV in LaTeX
As one of my professors pointed out a few years ago you should always keep your CV up to date. This is something I am bad at even though my CV is a pretty simple collection of Technical skills, Educational achievements and work history. Part of my problem is that I find Microsoft Word painful to use, and in general it’s probably not a great idea to write a CV in Markdown (though it could definitely be done). Fortunately I know some LaTeX and can use Pandoc so this is a totally solveable problem.
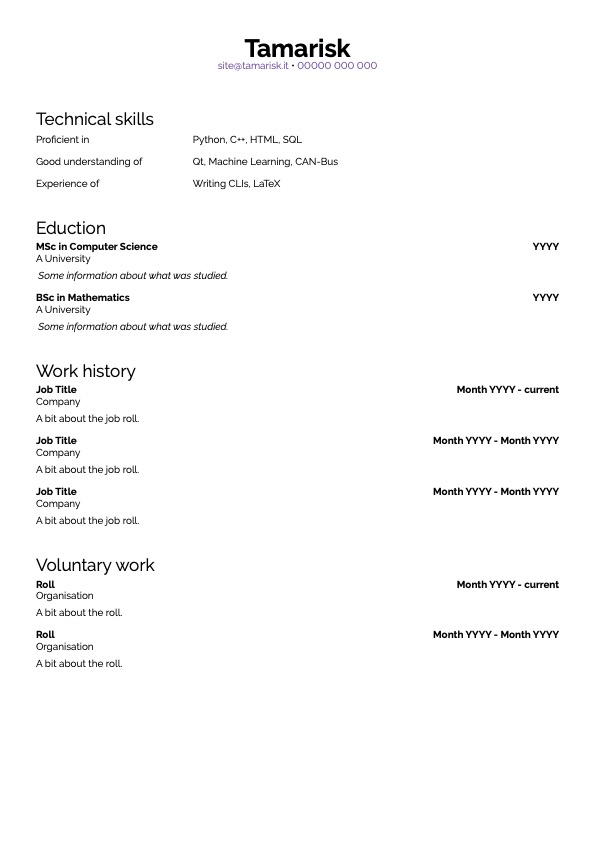
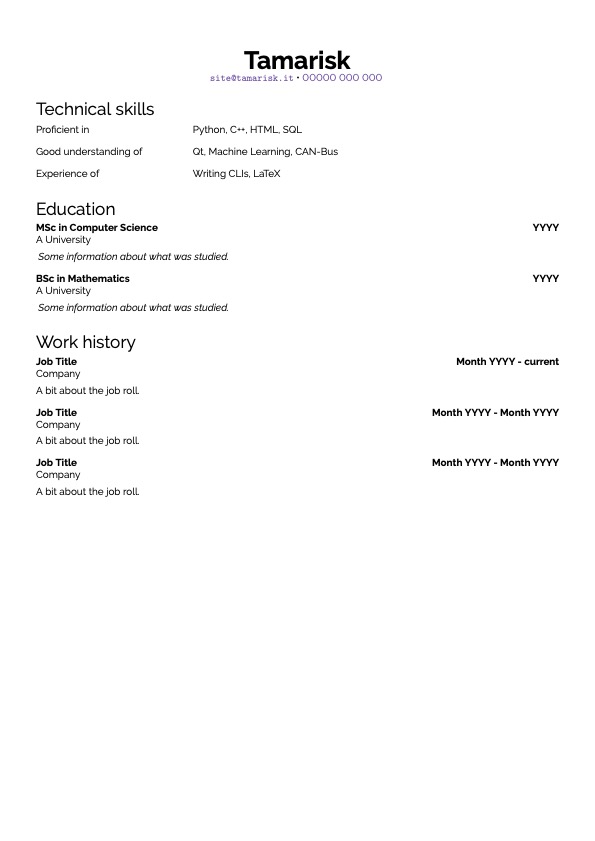
I want to end up with something which looks like this:
TL;DR: All of the code is available as as a gist on GitHub
Pre-requisites
LaTeX and Pandoc installed on your computer
Step 1: make a CV in LaTeX
There are plenty of resources out there to help you learn the basics of LaTeX so lets jump straight to a blank A4 document1 with narrow margins as we’d have in Word if we booted it up and picked Margins > Narrow from the formatting menu.
\documentclass{article}

\usepackage{geometry}
\geometry{
    a4paper,
    left=12.7mm,
    right=12.7mm,
    top=12.7mm,
    bottom=12.7mm
}

\pagestyle{empty}

\begin{document}
    Hello World!
\end{document}
Unadorned LaTeX documents are pretty distinctive but they don’t have to be this plain.
![]()
Style
I’m a fan of raleway which convieniently comes with LaTeX so lets go ahead and set that as the default font for our CV:
\usepackage[default]{raleway}
I also dislike hangining indents on my paragraphs so I’m going to get rid of those too.
\setlength{\parindent}{0pt}
Personal details
Typically I have my name, email address and phone number at the top of my CV. So lets go ahead and add those.
\usepackage{hyperref}

\begin{document}
    \begin{center}
        \textbf{\Huge{Tamarisk}}

        \href{mailto:[email protected]}{[email protected]} • \href{tel:07949151100}{07949 151 100}
    \end{center}
\end{document}
This whole section will be centered as it’s wrapped in center.
The name wants to be the largest thing so I’ve made that bold (\textbf) and set the font size to Huge.
In order to turn my email address and phone number into clickable links I’ve added the hyperref package.

The default link styling is kinda ugly so lets fix that next:
\usepackage{xcolor}
\definecolor{default-urlcolor}{HTML}{774DA8}

\hypersetup{
    colorlinks=True,
    urlcolor=default-urlcolor,
}

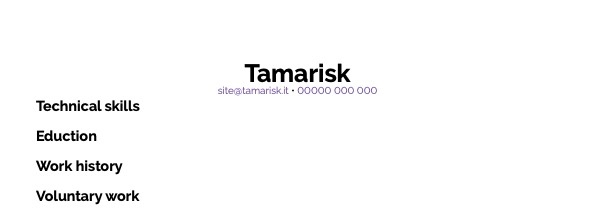
If you have more than one page on your CV you may want to move those details into the header. The fancyhdr package is a nice way to achieve this and gives you a lot of granular control over what goes in your headers/footers and where it goes. For this though all we’re going to do is define a header which contains a smaller version of our personal details block for all the pages after the first one. And redefine the plain pagestyle to include our larger header.
For the sake of brevity here I’ve moved from using the single blank line deliminator to the \\ to indicate a paragraph break.
\usepackage{fancyhdr}

% redefine headheight to allow for the double line header
\setlength{\headheight}{25pt}
\addtolength{\topmargin}{-13pt}

\pagestyle{fancy}
\fancyhead{} % clear header fields
\fancyhead[C]{
    \textbf{\large{Tamarisk}} \\
    \href{mailto:[email protected]}{[email protected]} • \href{tel:00000000000}{00000 000 000}
}

\fancypagestyle{plain}{
    % set headheight on plain to allow for the extra height in this setup
    \setlength{\headheight}{34pt}
    \addtolength{\topmargin}{-22pt}

    \fancyhf{} % clear header and footer
    \fancyhead[C] {
        \textbf{\Huge{Tamarisk}} \\
        \href{mailto:[email protected]}{[email protected]} • \href{tel:00000000000}{00000 000 000}

    }
}

\renewcommand{\headrule}{} % remove rule
\fancyfoot{} % clear footer fields

\begin{document}
    \thispagestyle{plain}
    Hello World! % page wont render without text
\end{document}
Sections
Most CVs have a few sections. Lets go ahead and add them.
\begin{document}
    \thispagestyle{plain}
    \section*{Technical skills}
    \section*{Eduction}
    \section*{Work history}
    \section*{Voluntary work}
\end{document}
The section command here needs to be followed by * to stop LaTeX giving each section a number.
The default section styles are OK but a bit overbearing for my tastes so I’m going to change them a bit using the titlesec package
\usepackage{titlesec}
\titleformat
{\section} % command
[display] % shape
{\LARGE} % format
{} % label
{0.5ex} % sep
{} % before-code
[ \vspace{-0.9ex} ] % after-code
This code changes the shape, size, separator and final vertical spacing to be a little more compact.

Macros
As each section will include a set of things that we want to style similarly we should setup some macros to keep that simple.
For the skills section we will use the tabular environment augmented by the array package to create a neat layout
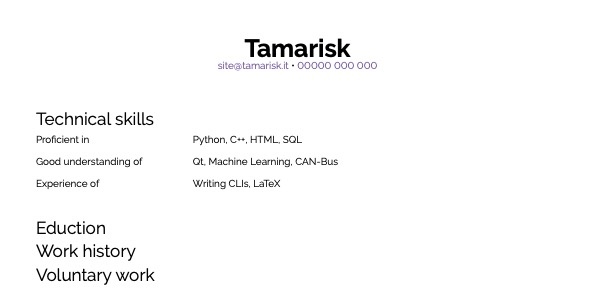
Skills
For the skills section we’re going to need two distinct inputs: the skill type and the list of skills. This is signified by the [2] after \newcommand{\skill}. We can then access those using #1 and #2
\usepackage{array}

\newcommand{\skill}[2] {
    \setlength{\tabcolsep}{0em}
    \begin{tabular}{ p{0.3\textwidth} >{\raggedright\arraybackslash}p{0.69\textwidth} }
        #1 & #2
    \end{tabular}
    \vspace{1em}
}

\begin{document}
    \thispagestyle{plain}
    \section*{Technical skills}

    \skill{Proficient in}{Python, C++, HTML, SQL}

    \skill{Good understanding of}{Qt, Machine Learning, CAN-Bus}

    \skill{Experience of}{Writing CLIs, LaTeX}
\end{document}
Education
The education macro requires more inputs: qualification, year of attainment, educational establishment and a space for some detail about what was studied. The layout is less complex though as it doesn’t require a tabular layout instead we can use \hfill to pad the gap between the qualification title and year.
\newcommand{\education}[4] {
    \textbf{#1\hfill#2}

    #3\vspace{0.5em}

    \textsl{#4}\vspace{1em}
}

\begin{document}
    \section*{Eduction}

    \education{MSc in Computer Science}{YYYY}{A University}{
        Some information about what was studied.
    }

    \education{BSc in Mathematics}{YYYY}{A University}{
        Some information about what was studied.
    }
\end{document}

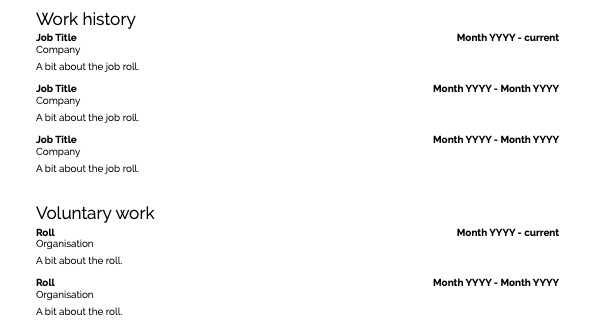
Work
We’re going to use the same macro for both voluntary and paid positions as the layout should be broadly similar. In fact the only real difference between this layout and the education layout is that we haven’t italicised the extra information. Despite this I have maintained a split here so that changes to one layout wont affect the other.
\newcommand{\work}[4]{
    \textbf{#1\hfill#2}

    #3\vspace{0.5em}

    #4\vspace{1em}
}

\begin{document}
    \section*{Work history}
    \work{Job Title}{Month YYYY - current}{Company}{
        A bit about the job roll.
    }

    \work{Job Title}{Month YYYY - Month YYYY}{Company}{
        A bit about the job roll.
    }

    \work{Job Title}{Month YYYY - Month YYYY}{Company}{
        A bit about the job roll.
    }

    \section*{Voluntary work}
    \work{Roll}{Month YYYY - current}{Organisation}{
        A bit about the roll.
    }

    \work{Roll}{Month YYYY - Month YYYY}{Organisation}{
        A bit about the roll.
    }
\end{document}
Step 2: turn it into a Pandoc template
Pandoc’s default template can be retrieved by copying it into another file:
pandoc -D latex > example.tex
That one is pretty complicated but we can start with something far simpler:
\documentclass{article}

$if(geometry)$
    \usepackage[$for(geometry)$$geometry$$sep$,$endfor$]{geometry}
$endif$

$if(fontfamily)$
    \usepackage[default]{$fontfamily$}
$endif$

\setlength{\parindent}{0pt}

\pagestyle{empty}

\begin{document}
$body$
\end{document}
This is the same as the base template we had at the beginning but allows you to set the papersize, margins and fontfamily via YAML front matter in your markdown file
---
fontfamily: raleway
geometry:
    - a4paper
    - right=12.7mm
    - bottom=12.7mm
    - left=12.7mm
---

Hello World!
To convert this markdown file to a pdf you need to pass the template to pandoc.
pandoc cv.md --template=pandoc-cv.tex -o cv.pdf
![]()
Convert personal details to variables
\pagestyle{fancy}
\fancyhead{} % clear header fields
\fancyhead[C]{
    \textbf{\large{$name$}} \\
    $email$ • $phone$
}

\fancypagestyle{plain}{
    % set headheight on plain to allow for the extra height in this setup
    \setlength{\headheight}{46pt}
    \addtolength{\topmargin}{-12pt}

    \fancyhf{} % clear header and footer
    \fancyhead[C] {
        \textbf{\Huge{$name$}} \\
        $email$ • $phone$
    }
}
Notice that I’ve removed the \href aspects here. Adding these items to the front matter enclosed in angle brackets (<>) or as a markdown url: [text](link) will render them correctly.
name: Tamarisk
email: <[email protected]>
phone: '[00000 000 000](tel:00000000000)'

Headers and macros
Due to the magic of pandoc we can straight up copy accross the macros and header formatting without changes other than to add \vspace{-4ex} to the header before-code in order to reduce the amount of whitespace to a more sensible level. The macros can then be used in our markdown document as they are.
# Technical skills

\skill{Proficient in}{Python, C++, HTML, SQL}

\skill{Good understanding of}{Qt, Machine Learning, CAN-Bus}

\skill{Experience of}{Writing CLIs, LaTeX}

# Education

\education{MSc in Computer Science}{YYYY}{A University}{
    Some information about what was studied.
}

\education{BSc in Mathematics}{YYYY}{A University}{
    Some information about what was studied.
}

# Work history

\work{Job Title}{Month YYYY - current}{Company}{
    A bit about the job roll.
}

\work{Job Title}{Month YYYY - Month YYYY}{Company}{
    A bit about the job roll.
}

\work{Job Title}{Month YYYY - Month YYYY}{Company}{
    A bit about the job roll.
}
Which, when rendered, looks like it did to start with ![]() .
.
Resources
-
If you usually use letter you can skip the papersize here as letter is the default. ↩